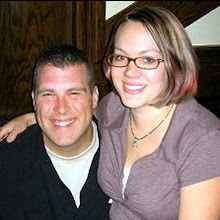
“JC, sit down! Honey, put your hands…. Wait… can you guys just look at me….ONCE?!?”
The time has come for the dreaded Christmas card photo. I don’t stress anymore. I used to obsess about the picture, getting everything just right. Once I thought I had that shot, I would spend actual hours browsing store’s ready made cards to drop that perfect picture in. Since I have fallen in love with Photoshop, and learned a few tricks, I will never again agonize over something I now find really fun!!
I want to share with you my 5 tips for editing and creating beautiful digital photo projects. Specifically, lets talk Christmas cards.
1) So you didn’t get the perfect photo. No prob. Photoshop to the rescue. If you are like me, a mama-razzi, you sit the kids down and take a bunch of photos. You’re bound to get one of each of the kids looking the way you want, probably just not at the same time. My problem area is the two-year-old. Now dig out the photo you’re most happy with:

Almost what I wanted! Go find the other photo, the one where Problem #1 is looking at you. I chose this one…
Get out your cool little lasso selection tool, and select that cute little face. Don’t worry about grabbing a little of the background, too. We’ll fix that. Cut and paste that sweet little face into your new photo. Use the right-click> Free Transform to make his big head fit that little body. Use Ctrl to keep the proportions the same as you shrink it! Grabbing a corner while you are in Free Transform mode will allow you to tilt, too, if your other head isn’t the same. Once you are happy with the results, Elements has a green check mark to confirm. I know you all can cut and paste. My little secret is this…. eraser tool! Use the eraser tool at about 35-40% opacity to smooth out the edges of the new head and blend it in with the photo behind it. When you are happy, merge the layers. TA-DA! Here’s mine:
2) Perfect photo complete, but there’s one more thing you need. Well, I need anyway. Amp up that color. It’s an easy little thing to do. You can see my first photo lacks a little vibrancy. Use the “Adjust Hue/Saturation” to just give a little bump. I took the greens and upped the saturation as well as the blue. I like how a little tweak of color can really liven up the shot.
3) Now you’ve really got the perfect photo for your Christmas card. Oh, you need a card. You need a card that is all you, not just another drop-in template from the mall. The very easiest way to start is get yourself a digital scrapbook paper kit. Have your own scrap book paper? Scan it in. You can use your crop tool to make a card size you are happy with (I chose 4x8 here). Let the fun begin!! Add your perfect photo (you know, cut and paste!) to the paper you’ve chosen. Your photo can even have a little shadow behind it. Just click on the photo in the Layers box and select the effects you want. Photoshop Elements has them all laid out for you to try. I chose this polka dot paper:
4) Greeting time! You may have found yourself browsing those templates at the mall. When you found one you liked, perhaps the greeting was all wrong. When you make your own card, you can say whatever is right for you. Make it long, or short and sweet. No one will charge per line!! You can add everyone’s names, ages, etc!
Because my paper is a little busy, I need a box to type in. You can use the Custom Shape Tool to make a box in any color you choose to sit behind your text. I went with green, and in the Layers area you can change the opacity. This one is at 85%. I love to play with the fonts and colors of the text, too. 
5) Last, but probably most fun, embellishments! If you purchased a digital scrap book pack, chances are it came with some fun little pieces to add to your card. Snowmen, snow flakes, christmas trees, candles, etc. If not, don’t worry! Elements has a cute selection of shapes from the Custom Shape menu. Choose colors, choose shapes. You’ll have a lot of fun coming up with a few last touches for your card:
That was fun, right!? I love making our cards each year. No longer is it the dreaded task it once was! I’d love to see what you come up with!!
I wrote this blog post while participating in the TwitterMoms and Adobe blogging program, making me eligible to receive a $50 gift card. For more information on how you can participate, click here.


